Hey ADVNTRers,
Sometimes when you’re new at something and looking for information, it can be hard in a world filled with know-it-alls, to put yourself out there, and ask questions. You can use ADVNTR as a resource for some information. Heck, just send us an email (help@advntr.ing) and ask. We’re happy to help. Below, we’ve outlined some things that are a great place to start (and not location specific).
Personalized map
Map/Navigation
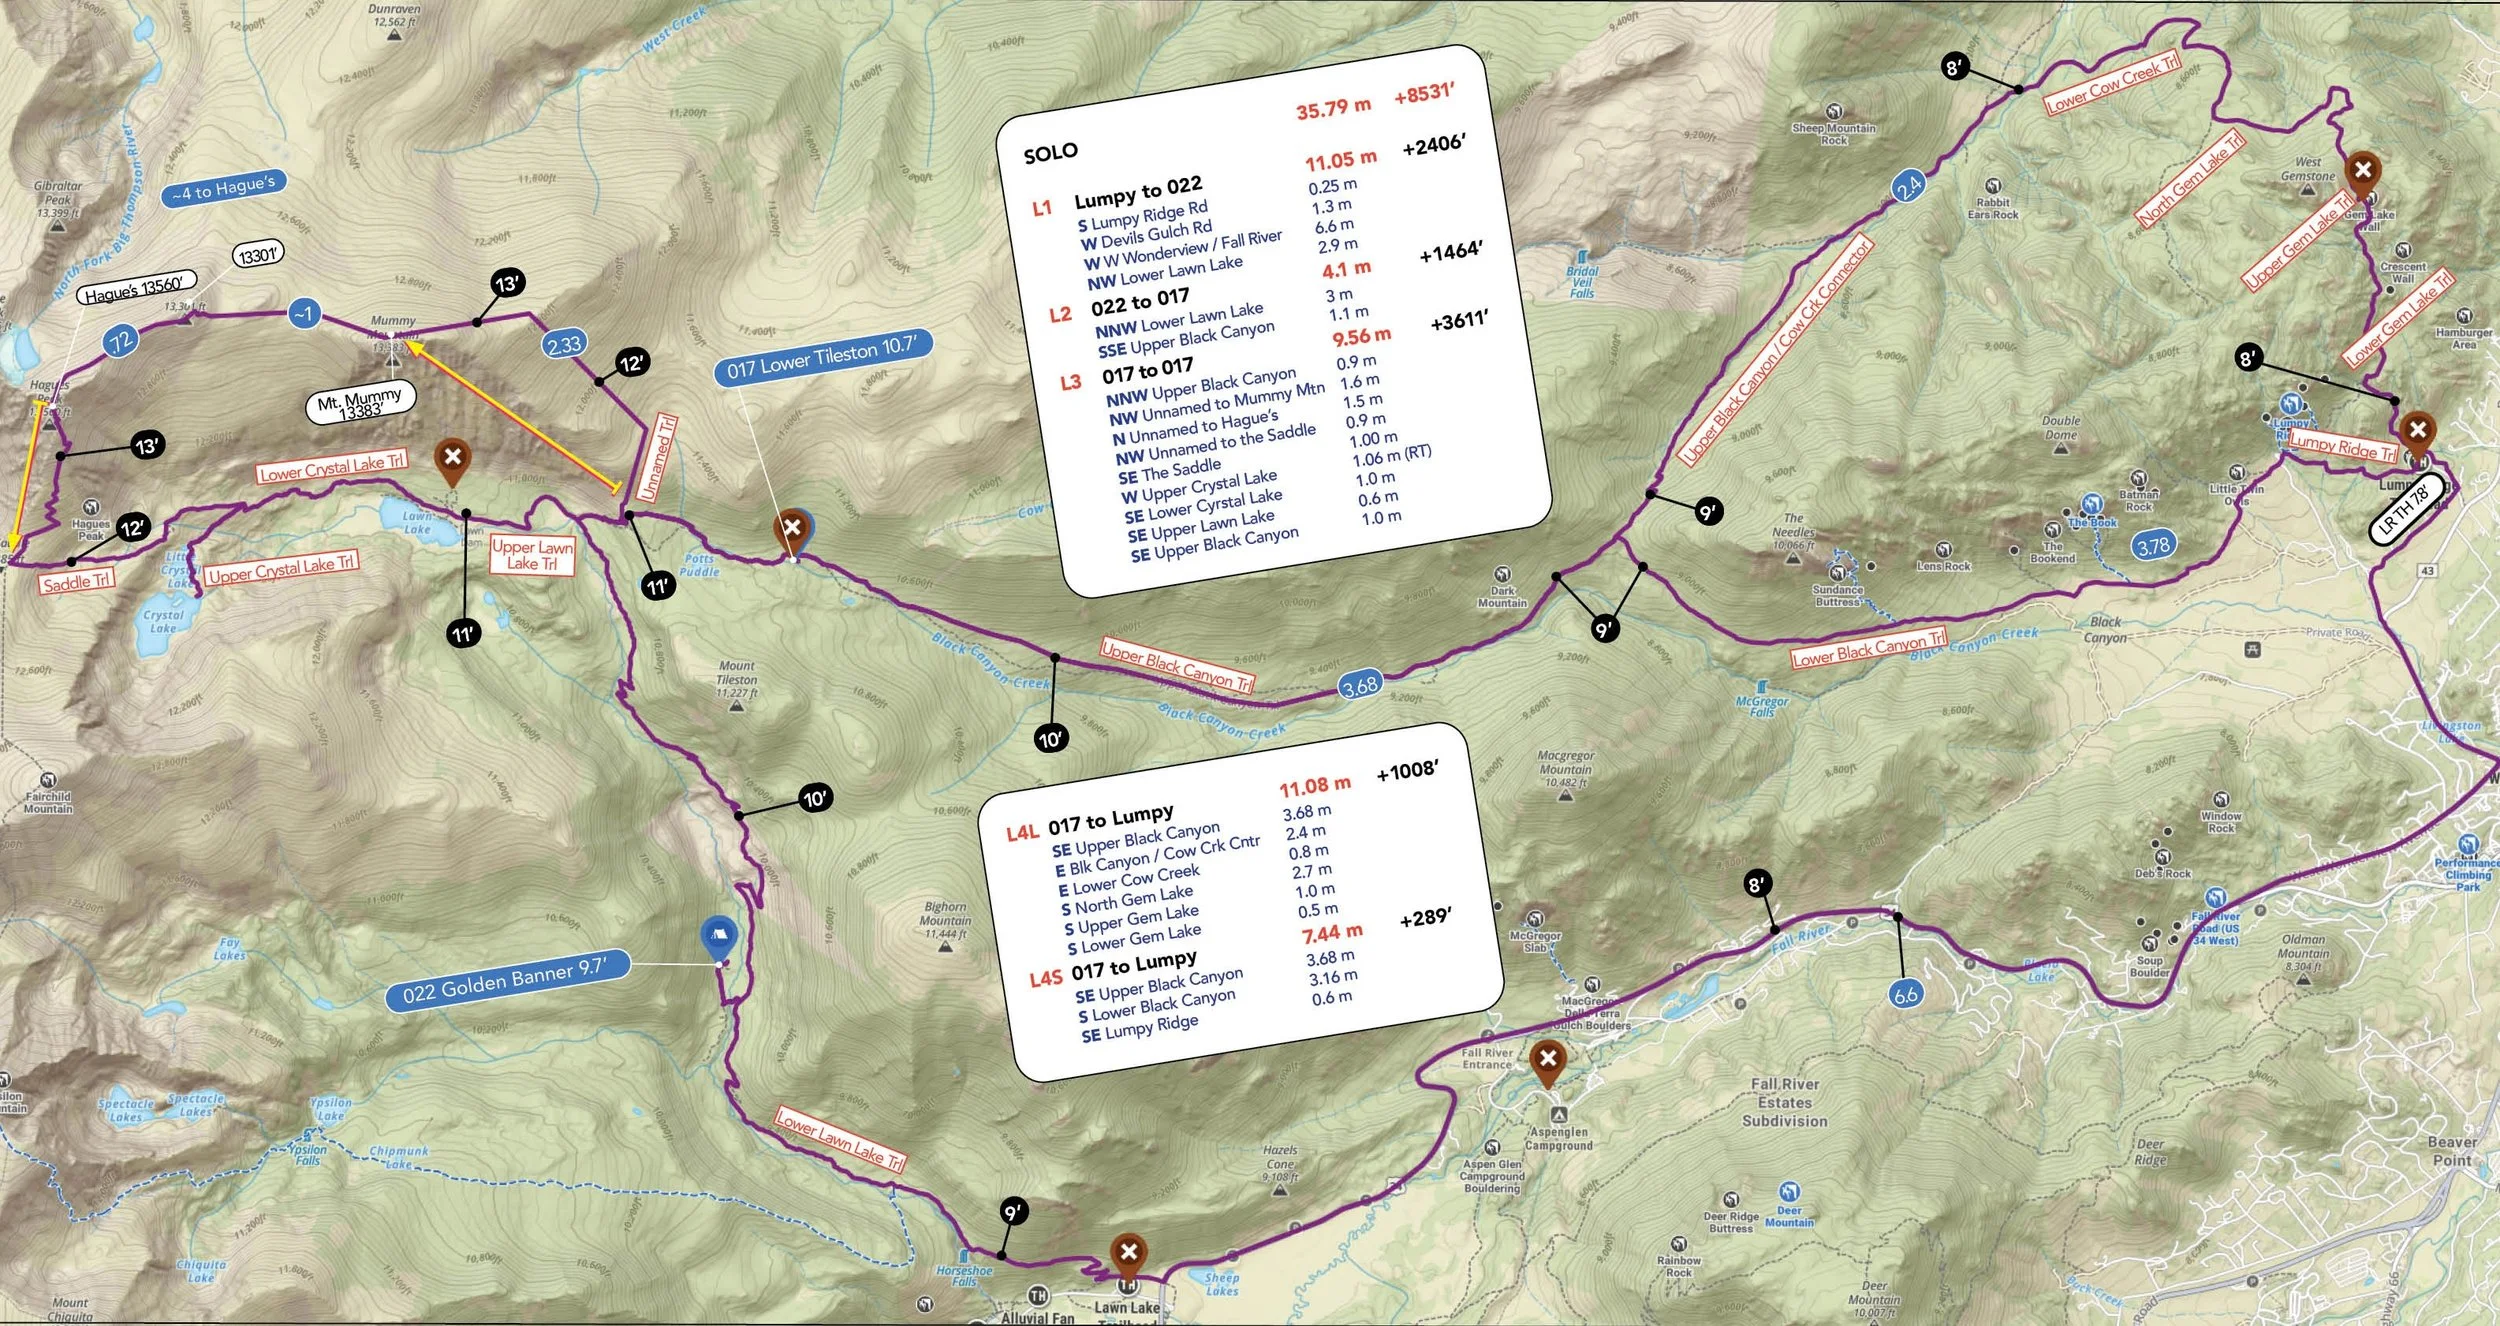
In conjunction with park-issued maps, I used onX Backcountry (not an ad) to plan my trip well in advance. “Well in advance” is the key here. You should pretty much know your route, goals, altitudes, and major milestones like the back of your hand before you step foot on the trail. I like onX for its customization and versatility properties.
Because I’m especially neurotic, I personalized my map to a weird degree, printed it at my community library, and then had it laminated at an office store so it would withstand sweat, water, and dirt. Should I lose all electronic capabilities, I still have a map, and referencing a paper map allows you to keep your phone off WAY more, letting the battery last longer.
I shared my map with the appropriate people so they’d know my route.
Safety/comfort details my map included:
Trail names/distances
Campsite names, numbers, and altitudes
Topography with every 1,000’ gain marked (the numbers were too hard to read on the printout)
Established bathrooms/vault toilets
Reference peaks
Bail routes
General cardinal directions of each individual trail for traditional compass navigation
Altitude gain/loss
Water sources
“Struggle Zones” (the pink/yellow arrows) which simply meant large altitude gain/loss in a short distance
Water
This might be the most important thing. They’re all important, but this one will sneak up on you fast. A lot of sources will say 1L for every 5 miles hiked. This is a good starting point. Now take into account your altitude, humidity, temperature, and last but not least, access to water sources.
If you’re dry camping/backpacking/hiking (no access to a water source), you have to carry ALL of your water from the start, and keep in mind, water is heavy. We’re talking 1 kilogram (2.2 pounds) per liter. A 20-mile adventure would be around 8.8 pounds; more if you’re at a higher altitude, or it’s an especially hard hike, or it’s hot, or (gasp!) all 3.
And don’t forget–if you’re cooking with water, you’ll need to factor that in too.
Filtering
Filtering is lovely because you don’t have to carry so much weight, but it takes detailed planning and calculating. When you’re planning your route, you need to notice where there are reliable water sources and figure out how much water you need to get to each one. With climate change and AI data centers drinking up all our fresh water, you’ll have to find recent reports from people who’ve been on the trails to see if those water sources are still there.
Food Planning
Think through each day, the meals you’ll need (breakfast, lunch, dinner), the snacks you’ll want, if you’ll eat on the go, or do a full break and eat a bigger snack, etc. Do you want to cook with your stove for lunch or not deal with it?
I thought about traditional backpacking meals and found that a lot are two servings and the single-serves are so expensive. Because I was going alone, I didn’t want to have any left over, because once it’s rehydrated, it’s HEAVY. Plus, even one serving of those meals are usually too much for me. I experimented with dehydrating my own single-serve meals and packaging them individually, which helped save both weight and space (and cut down on waste by nearly 100%). Prepping my own ingredients also reduced the cost per meal substantially. Having done a ton of outdoor activities and field sports, I know protein and calories are your friend, but also important, if you don’t feel like eating it, you won’t, and then it doesn’t matter how good it is for you. You need to find things you actually want to eat and that will withstand jostling, heat, and cold. My special treats were M&Ms and chocolate covered espresso beans. What are yours?
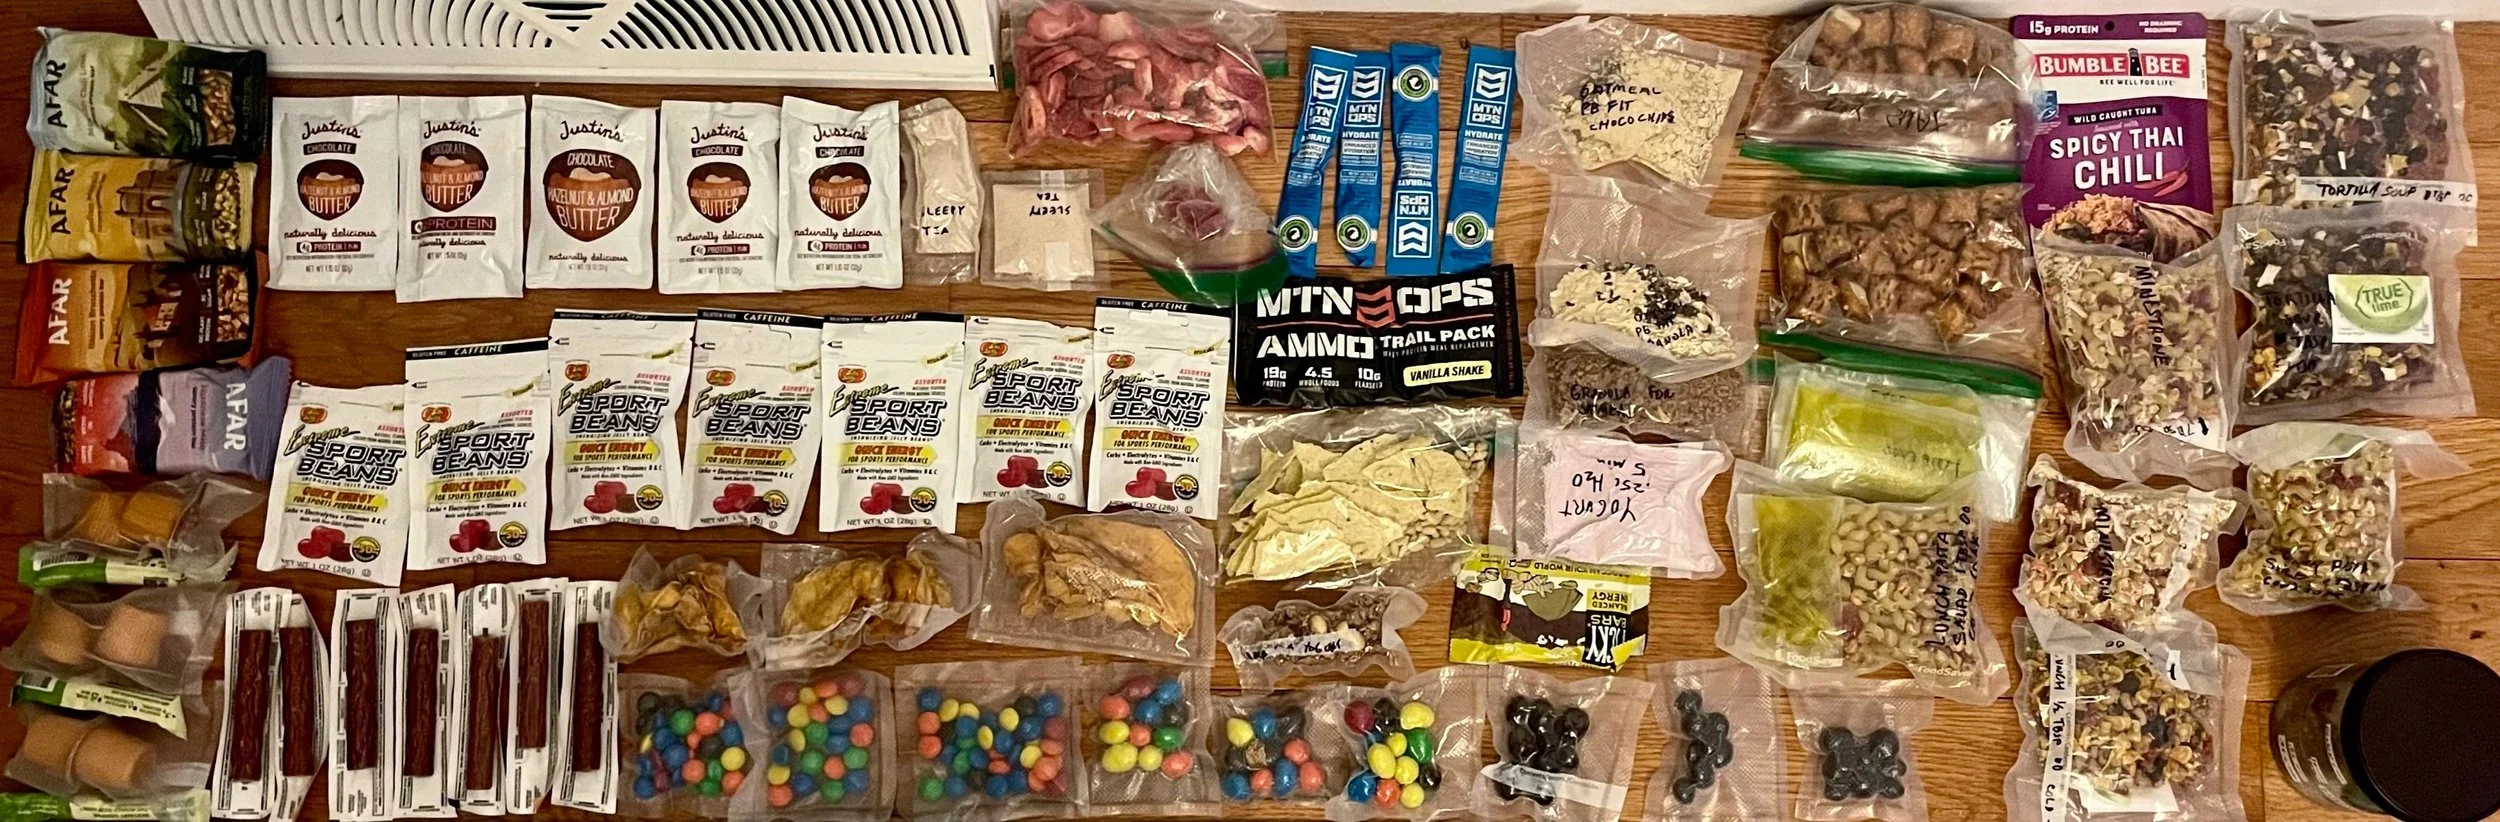
First attempt for 4 days and 3 nights. This seemed like too much, so I reallllly thought about it and got down to this:
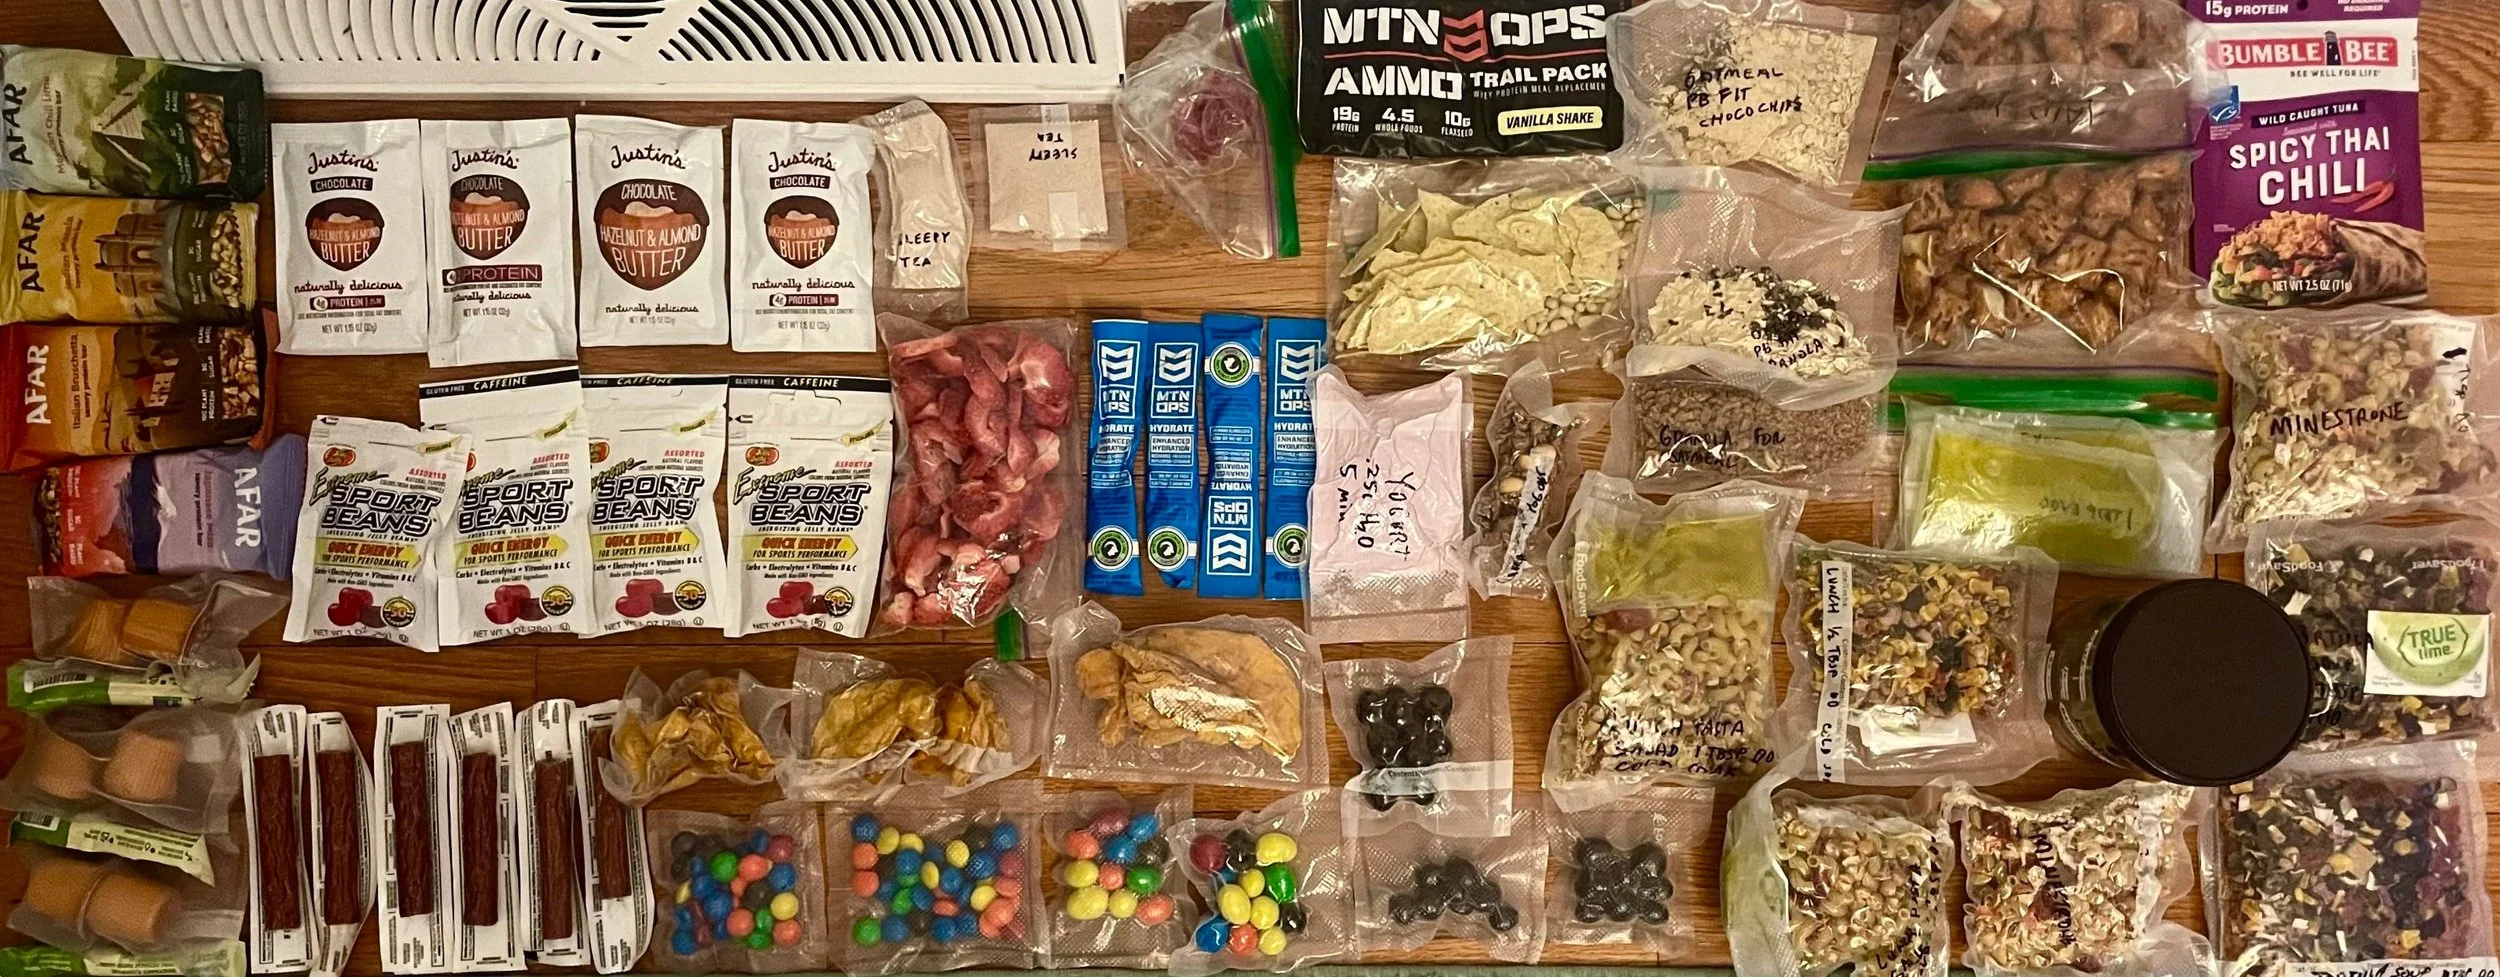
I mean how many Sport Beans does someone need for 4 days? And I learned that I didn’t like the Sleepy Tea, so no need to pack that next time. Each trip is a learning experience.
You might want 5% more food than necessary in case your trip takes longer than estimated (if say, you get a bad blister and are moving more slowly than anticipated ). I did this and was pumped that I basically ended up with just my emergency stash left (it was a protein shake, a few tiny snacks, and an extra electrolyte packet).
Meds
I take a lot of prescription medications due to a spine injury. While I might forgo taking vitamins on the trip (because they’re gummy and can melt), I can’t forgo my spine meds. I just took enough for each morning and night dose. Then I took some incidentals like Excedrin or Benadryl for random things. Don’t overdo these. I took one dose of each and used none.
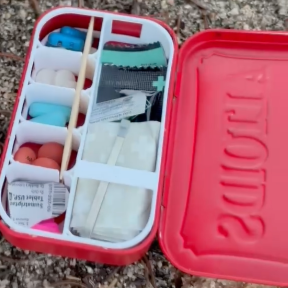
ADVNTR’s Code Red : Classique
I combined my first aid items, Rx meds, and incidentals into an upcycled Altoid tin.
I require Epipens for a fatal yellow jacket allergy. For me, these are an every day carry item–I always have 2. With how deep I was in the park, a sting would require a helicopter evac (more on this later); I would not be able to get out on my own due to the severity. That said, I’d need to be able to keep myself alive while I waited, so I had 4 Epipens with me. Annoying amount of space and weight, but 100% necessary in my case. There are things you can skimp on, but life saving items are not one of them. Take your inhalers. your injections, insulin, whatever.
Communication
Like I mentioned above regarding my yellow jacket allergy, you need to have a way to communicate in case of a major emergency. A lot of remote places don’t have cell coverage. Satellite coverage is the way to go. Many newer cell phones have this capability, or it can at least be activated temporarily, but please verify and practice using it before you leave. My cell phone is too old for this technology, so I borrowed a Garmin InReach (not an ad, unless they want to send me one of my own) satellite communicator. There are now three generations, each with improvements and different conveniences, but the basic need is the same for all of them–SOS. I was able to send a text at the end of each day to anxious loved ones that I had reached my destination. I hate being tethered when the whole idea is to be untethered, but if it’s as simple as “I’m safe,” and you’re disciplined enough to not have a full-on conversation with your mom, it does create peace of mind for the people who care about you.
Basic First Aid
Listen, I’m not taking the supplies for the stuff I know how to do, so it doesn’t matter that I know various taping techniques for different ankle injuries, but you should know how to clean and dress a basic cut/scrape/burn. You should know CPR. The Heimlich Maneuver. You should know the signs of hypothermia, heat exhaustion, altitude sickness, or dehydration and what to do about them. If you don’t, your local fire station or library can either teach you or lead you in the right direction of an organization that will. Redcross.org offers a number of online courses.
Sun Protection
Don’t take this lightly. Sunscreen or sun protective clothing. Do it.
A Warm, Waterproof Layer
No matter where you live, no matter how consistent the weather has been, as soon as you expect it to do what you think it will, it won’t. Take a warmer layer, or a minimum, a rain jacket. Because sometimes it starts raining. And sometimes it gets cold and dark…
Light
A headlamp, lantern, or flashlight should be in your kit. If I have to choose one, I like a headlamp because I can be hands-free.
Fire/Heat
This is tricky, because a lot of places have a fire ban–or should. Don’t be the one that starts a forest fire. Just pack the correct layers.
Shelter
Depending on what you’re headed out to do, this may be overkill, but if you’re doing an evening hike, it’s not a terrible idea.